DIY Maverick Rev. 6 Nerf Gun Modification

By: Emily Catherine

Things you'll need:
- One Maverick rev. 6 Nerf gun
- Phillips head screw driver. (make sure it is rather small, otherwise you will scratch the paint off)
- Flat head screw driver. (This is very useful for prying the gun open)
- Sandpaper.
- Flat black spray paint.
- Rub 'n' Buff Paint. You can use multiple colors.
- Metal ruler.
Tip:
Rub 'n' Buff can be rather hard to find. I bought some at Hobby Lobby for about 6.99$ each tube covers around 20 sq. ft.
Step one: Painting prep

The first step is super easy. Start by sanding off all logos and warning signs. Make sure that everything is smooth to the touch. I decided to leave the "Maverick rev. 6" label on my gun.

For an added effect, I melted gouges onto the surface of the plastic using a wood burner. I used a metal ruler to make sure all lines were straight and smooth. You can also add small holes, dents, and just general wear and tear. Get creative ;)

Tip: When using the wood burner, go into a well ventilated room or just go outdoors. Make sure that you are using a tip that tapers at the end. You will be able to change thicknesses of your lines this way. Also be extra careful in this step not to melt all the way through the plastic of the gun.
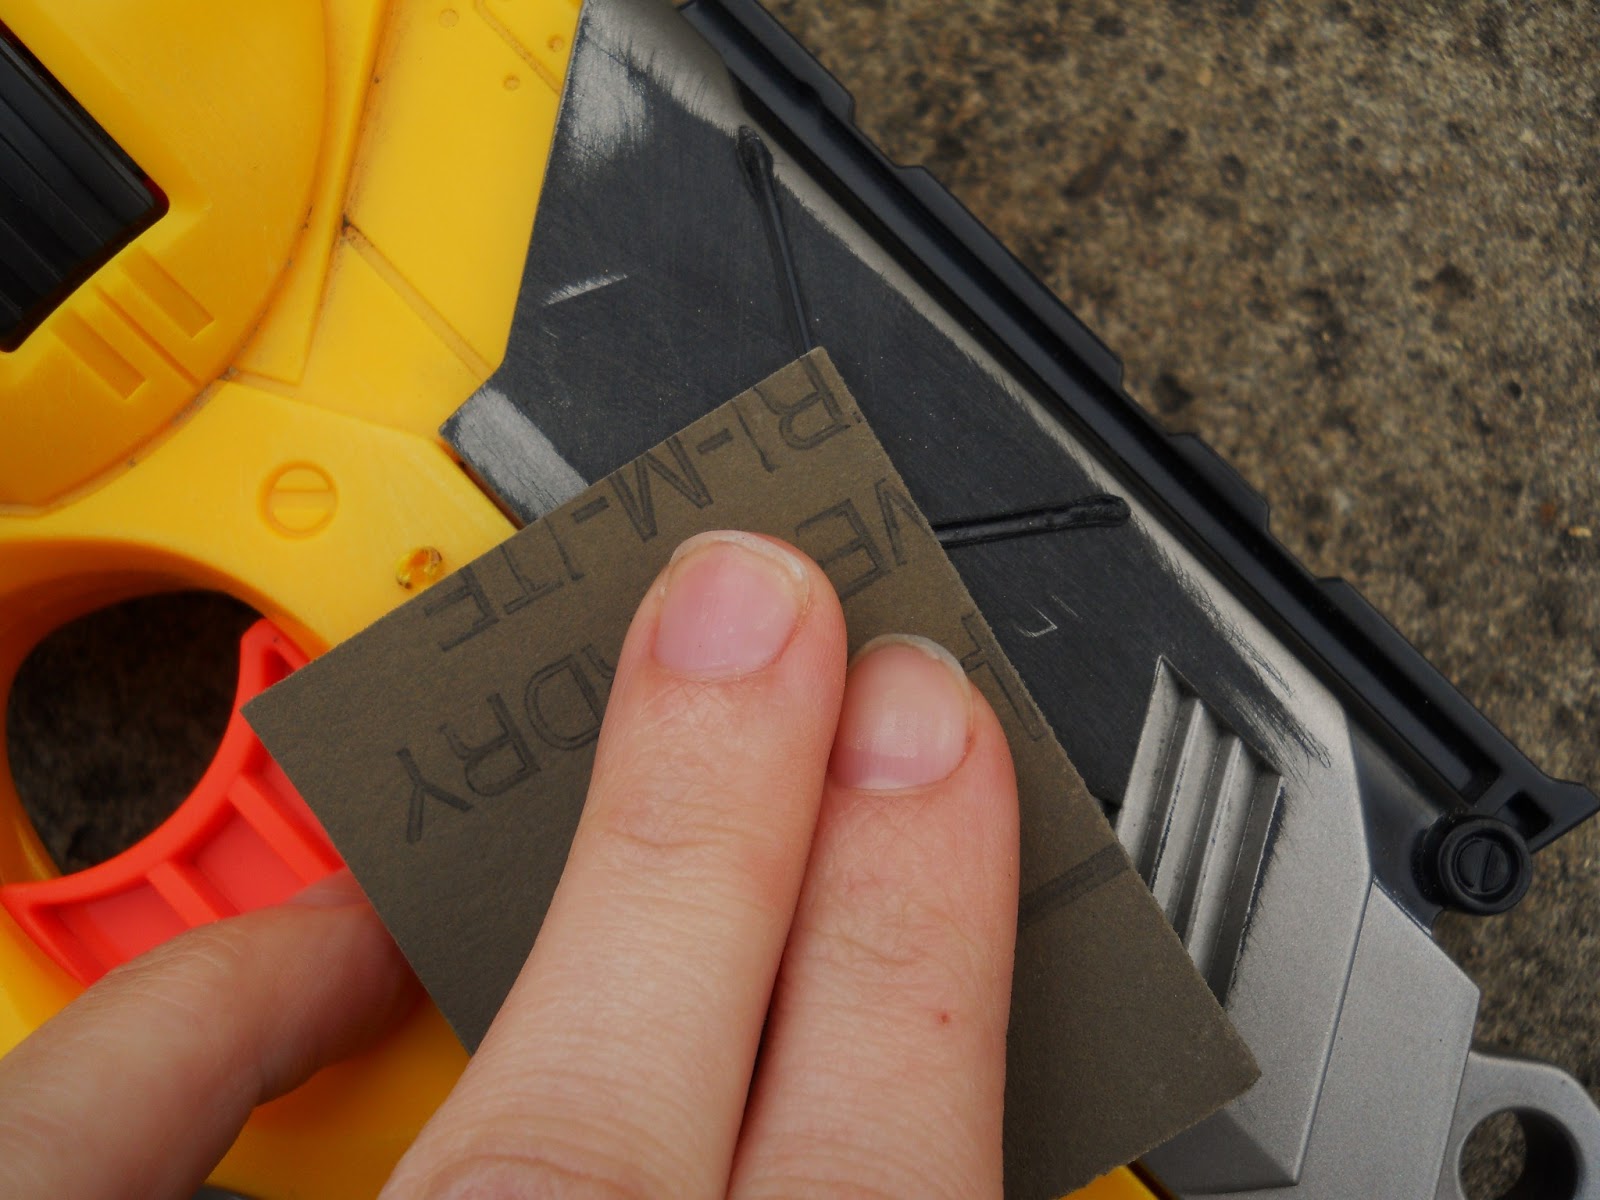
Sand the gun once more! Pay particular attention to the melted lines you just added. Make sure you have no hardened globs of plastic.
Step two: Take it apart!

The next step is rather simple, take the gun apart so it is ready for painting. You will only have two different screw sizes that keep the outer shell of the gun together.

There are three smaller screws in total. Two of these keep the gray loading piece together and the last can be found beneath it. The larger screws are used to keep the rest of the yellow shell together
Start by unscrewing the smaller screws in the gray loading piece on the right side of your gun. It will pop in half with some effort, and the last short screw will be found underneath at the butt of your gun. The longer screws are also on the right side of the gun in various places.
Tip: Each time you take out a screw, immediately place it in a small baggie or container.
Starting with your fingers, begin to pry the gun apart. You may need to use a Flathead screw driver to help at the handle.
 |
| Remove all pieces with the green dots. |
I will explain the removal of these pieces going from left to right.
The Trigger
The first piece you should take out is the trigger. You can do this easily by unscrewing a single silver screw located directly above it and it should pop out easily.

The Air Pump
Next remove the air pump. It is located at the top of your gun to the right of a very large spring. This piece just pops out.
Tip: You may remove and stretch the large spring (Just left of the air pump) to make the gun shoot a bit harder. Make sure you don't over stretch it. Otherwise, your gun will make a scary banging noise and not shoot.
The Barrel
This can be a bit tricky at first. Push the barrel forward so there is a bit of room between it and the hexagon shaped piece and pull towards you. The piece should come out with a bit of effort.
The Muzzle
Just pull and it will come out!
Step Three: Paint Job
 |
| The Rub 'n' Buff really brings out the scratches. |
Coat all pieces you removed and the outer shell in flat black spray paint. Make sure to get the shell thoroughly and avoid misting the inside if possible.
Be patient and let it dry.
Tip: Make sure not to coat everything too heavily, otherwise this will cause uneven paint with a strange bubbly appearance. Follow paint can instructions on second coat and drying time.
 |
| Start with the barrel! |
Once dry, begin to apply Rub 'n' Buff to your barrel. Make sure you don't mind the surface you are using getting slightly sparkly and silver! You can put your Rub 'n' Buff on a small plate or sponge. Dab a small amount on your finger and wipe of any access onto a paper towel. Begin to rub the surface of the barrel until covered completely. Do the circular muzzle, trigger, and end of air pump next.

Tip: Make sure you are using a very small amount of the stuff. Just a little bit goes a very long way.
I put the inner pieces back in place and then popped the outer shell together and began painting the rest. I didn't screw anything in at first because I wanted to make sure that everything worked properly before I went through the trouble of screwing everything together.

Tip: Smudge a bit of gold to the corners and edges to add an aged metal effect.

Once you have added the desired amount of Rub 'n' Buff put your gun back together!
Tip: The outer shell mechanism that loads the gun can be a bit tricky. make sure that the silver bar on the left loading shell is through the loop on the spring. After you have put the core pieces together and screwed them in place very carefully slide the bar on the loading shell through the loop in the small window. Make sure that the two halves join together before screwing.
YOU ARE DONE!
Now give yourself a big high-five and skip off into the sunset!
 |
| Before |
|
| AFTER! |

No comments:
Post a Comment